
July 22, 2024
In this guide you will learn how to level a Templar character in a fast and efficient way. This setup is based on the speedrunning builds used by the top Path of Exile racers, with a few modifications that make it easier to use while keeping all of the speed.
This leveling strategy transitions directly into a Brand Inquisitor build and has been optimized for it, but it can be used to level any elemental spell caster Templar build.
This guide comes with a detailed PoB and a Video version that contain a step by step passive point progression and further explain it. You can also check out a full act 5 run that showcases this strategy in action.
PoB: https://pobb.in/LKwF8IFN0cCd
[Updated with new end-game example setup]
Your leveling speed depends on two main factors - how much have you planned ahead and how much have you practiced. While this guide is extremely detailed and will basically hold your hand for every choice you have to make when it comes to your build, your results will depend a lot on how much you practice. I recommend doing multiple practice runs and focusing on the first three acts (until level ~30-33 and the first lab) until you become comfortable with it.
I highly recommend using a loot filter prepared specifically for this build. Here are build specific items to highlight that will save you a lot of time and currency while leveling:
3 link BBB in act 1
3 link BBR in act 1
2+ link GR shields in act 1
3 link GGR shields
Goat's Horn in act 1
Jade amulet in act 1 and 2
Heavy belt in act 1 and 2
3 link BBB Weapons
If you're interested in using my personal Templar Leveling Loot Filter that I use for this build, I share all my filters with Patreon supporters - you can find them here: https://www.patreon.com/asmodeuspatreon
Before making our Templar character, I highly recommend creating a Ranger first and killing Hillock with it. Making a Ranger grants you access to a full vendor reset for both vendors, extra scrolls of wisdom and the
Momentum
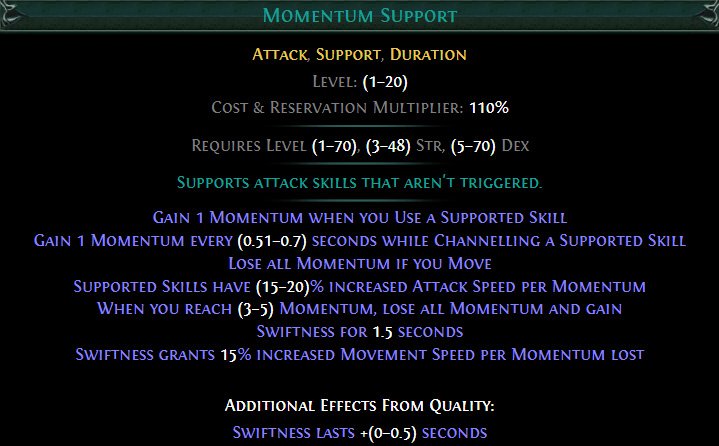 gem from lvl 2. It is worth the 1.5 minutes it takes.
Use this regex to highlight items in the vendor for quicker search by pressing "ctrl+f", "ctrl+v":
-\w-.-|ts:.+(\S*b){2}|g-r|r-g|nne|rint
(This will highlight items with at least two blue sockets, movement speed boots, four-linked items and green+red two-links for your
Shield Charge
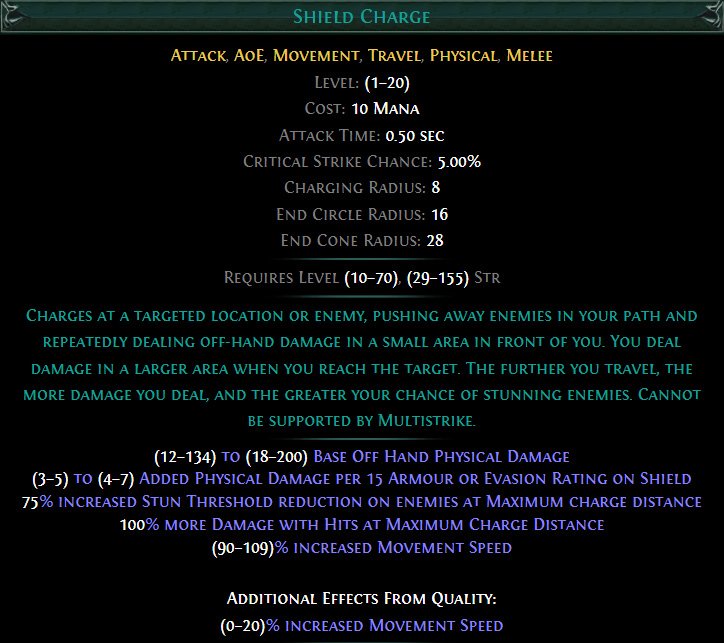 setup, which ideally would be socketed in a shield)
In the beginning you're looking for:
3 link BBB - or at minimum 2 link BB
2+ link BR
R-G 2 link shield (or other R-G 2 link)
Coral Ring, ideally with a high implicit roll
In the rest of your gear you want as many blue sockets as you can get, with an extra green socket for act 2. I recommend holding on to at least one RGB item which will make your act 2 and 3 gem swaps easy.
*(A note about MS boots. It is generally more important to have the right gem sockets than the extra movement speed. At the beginning of act 3 you can craft movement speed prefix on boots from your crafting bench for 3 augmentations, until then only use MS boots if it doesn't stop you from having the right sockets and links, but of course ideally you'd want both)
- Pick up
Rolling Magma
 as your quest reward and link it with
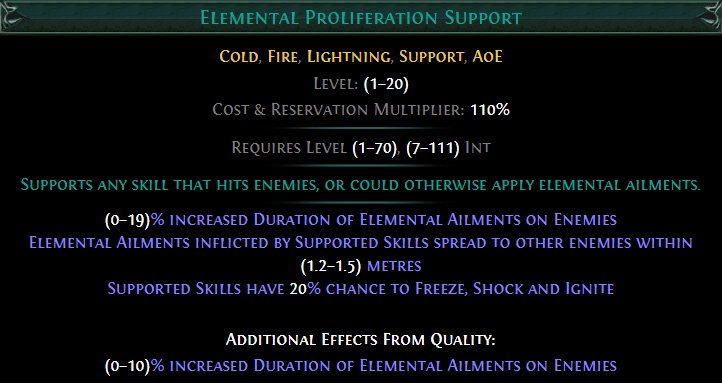
Elemental Proliferation
as your quest reward and link it with
Elemental Proliferation
Use Two Driftwood Sceptres until level 4 and after that swap to a shield. Try to get Goat's Horn as soon as you can. The 2-4 flat fire damage is very strong during the early levels.
After Mud Flats and Killing Hailrake
- Pick up
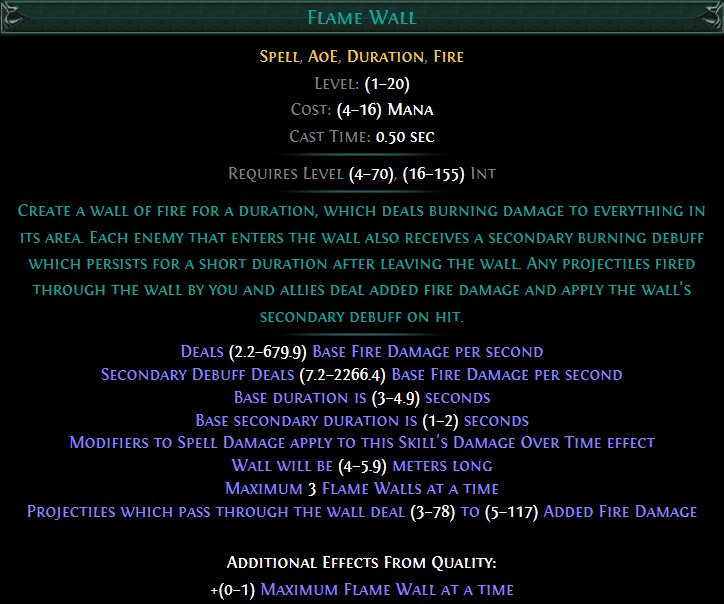
Flame Wall
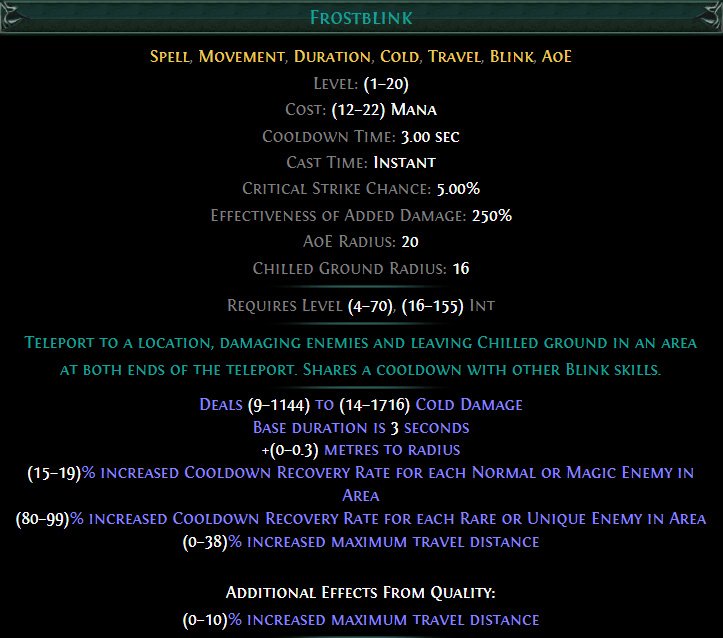
 ,
Frostblink
,
Frostblink
 , Quicksilver and
Arcane Surge
, Quicksilver and
Arcane Surge
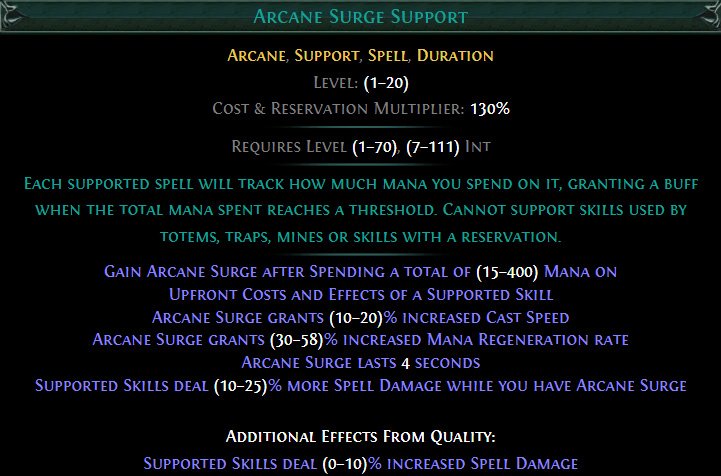 as your quest rewards.
- Buy
Shield Charge
,
Holy Flame Totem
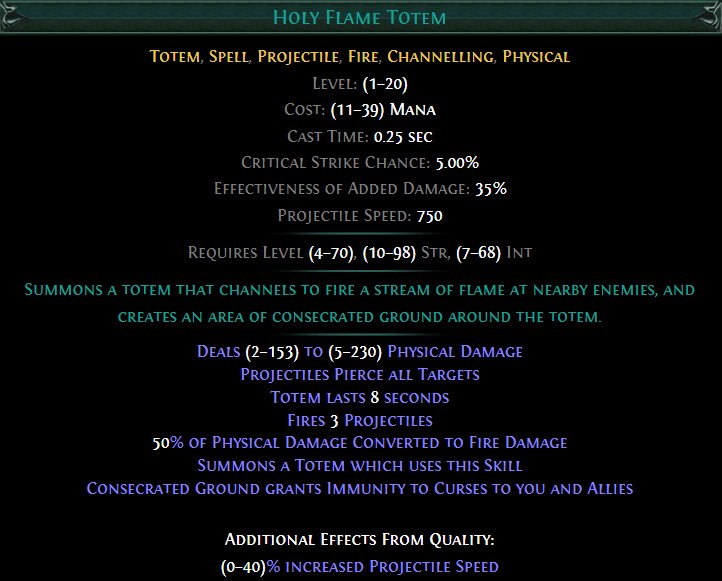 , and
Summon Phantasm
, and
Summon Phantasm
cost: 3 wisdom scrolls
Equip them all and link
Holy Flame Totem
with
Summon Phantasm
.
If you find extra 3-link items with the right colours, but you already have a good 3 link in that slot - it is often worth putting it in the stash as a backup. Finding a 4-link or a good pair of boots can force you to replace your old 3-link and having a couple of backup items for your main gem setups can save you in those situations for a few seconds of time investment.
After killing Dweller of the Deep and right before fighting Brutus
- Pick up
Combustion
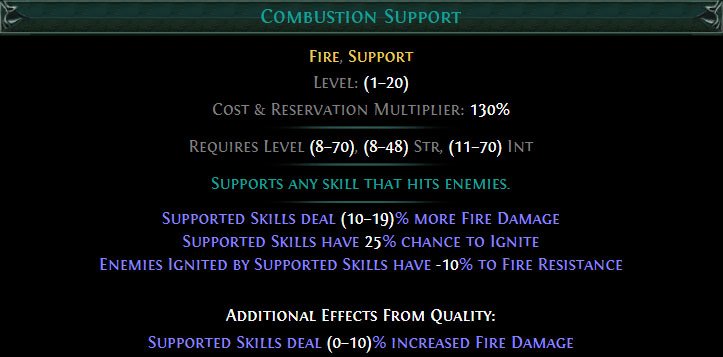 as your quest reward and link it with
Rolling Magma
and
Elemental Proliferation
whenever you can.
as your quest reward and link it with
Rolling Magma
and
Elemental Proliferation
whenever you can.
Your ideal setup would now look like this:
-
Rolling Magma
+
Elemental Proliferation
+
Combustion
-
Holy Flame Totem
+
Summon Phantasm
-
Flame Wall
+
Frostblink
+
Arcane Surge
(don't have to be linked but that's ideal)
Check the vendor for Goat's Horn if you have extra wisdom scrolls. Ideally you want 2-4 fire damage on the implicit.
If you have your
Holy Flame Totem
in a 3-link with an extra red or blue socket, and an extra Transmutation orb, you can link
Added Fire Damage
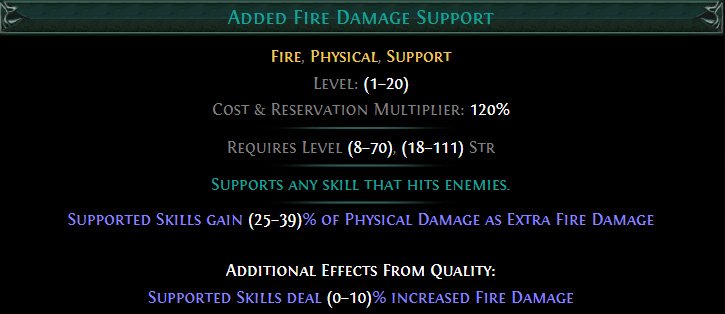 or
Added Lightning Damage
or
Added Lightning Damage
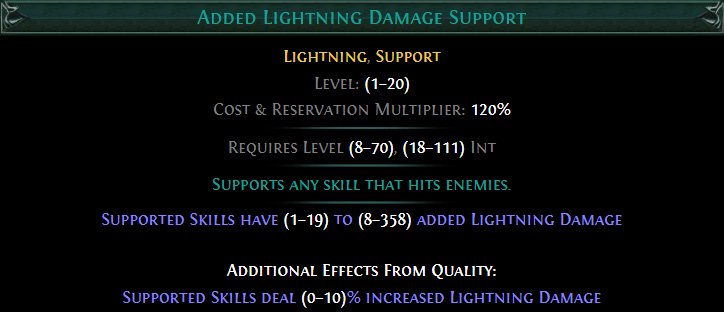 to it.
After killing Brutus, pick up
Flame Dash
 as your quest reward and use it instead of
Frostblink
as your quest reward and use it instead of
Frostblink
After completing the Chamber of Sins, pick up
Herald of Ice
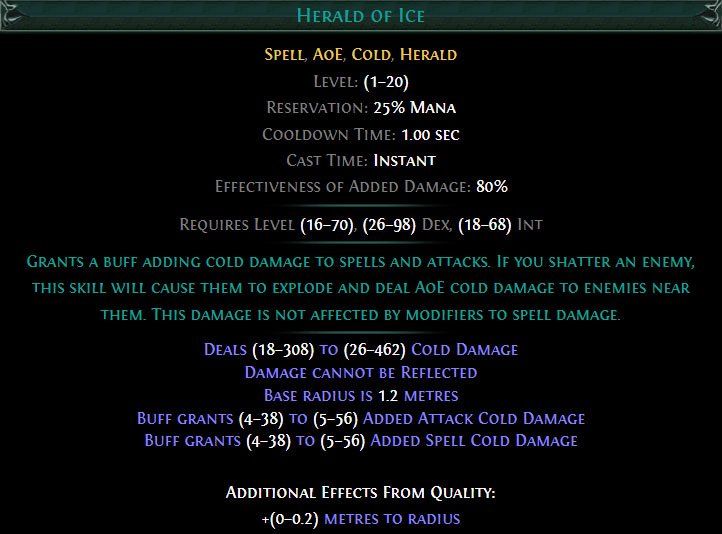 as your quest reward and buy
Herald of Thunder
as your quest reward and buy
Herald of Thunder
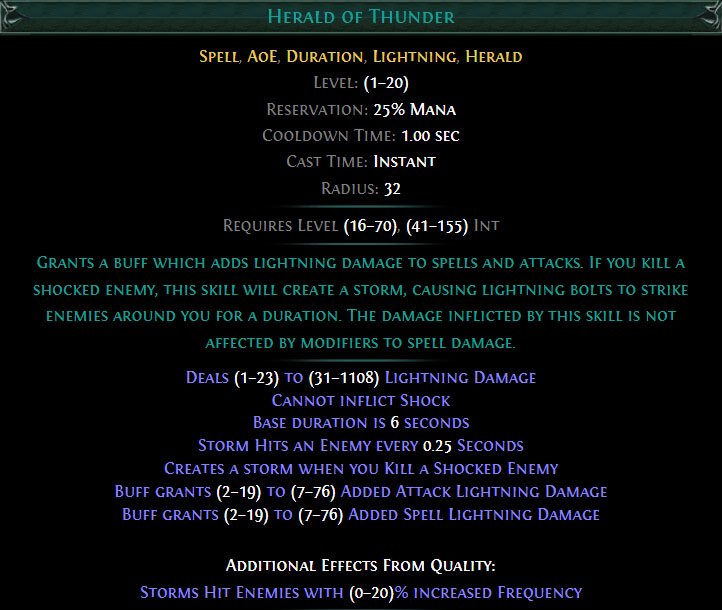 . Use them both. Also buy
Wave of Conviction
. Use them both. Also buy
Wave of Conviction
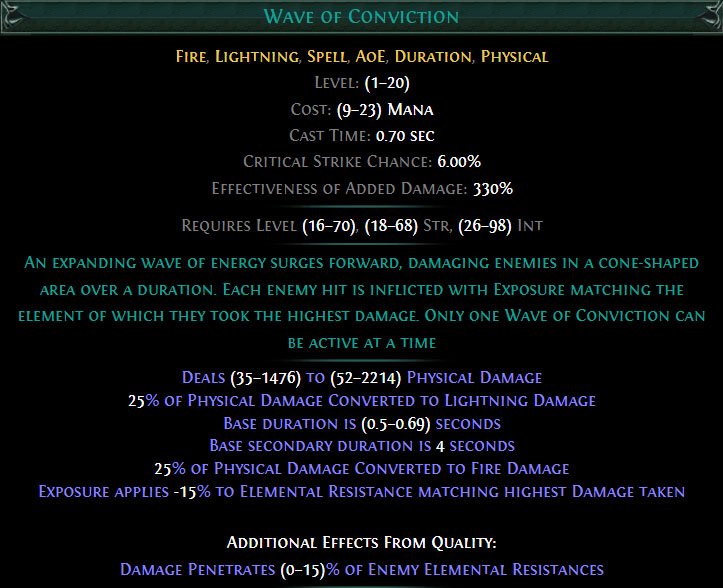 (you can use it right away or after lvl 28 swap).
Cost: 2 Alterations
Don't pick up the quest reward for killing The Weaver immediately. Leave it until you get a 4 link. If your 4 link has all blue sockets, you will pick up
Concentrated Effect
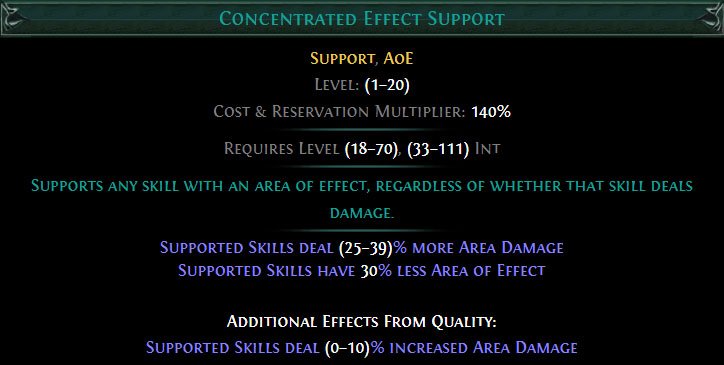 . If your 4 link has three blue sockets and one red socket, you will pick up
Cruelty
. If your 4 link has three blue sockets and one red socket, you will pick up
Cruelty
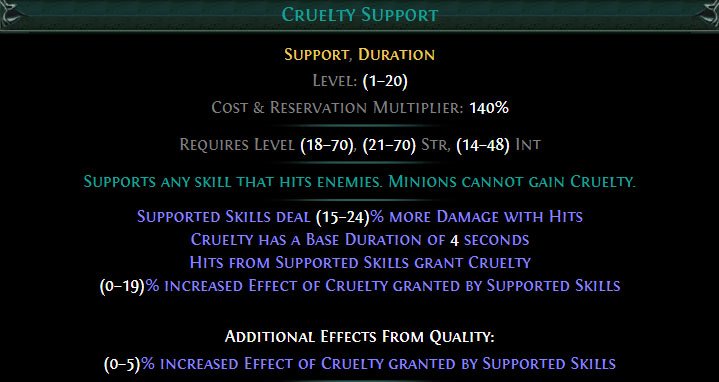 . The gems given as quest rewards gain XP similarly to gems sold by the vendors, so whenever you pick it up, they will have an appropriate level.
Buy
Flame Surge
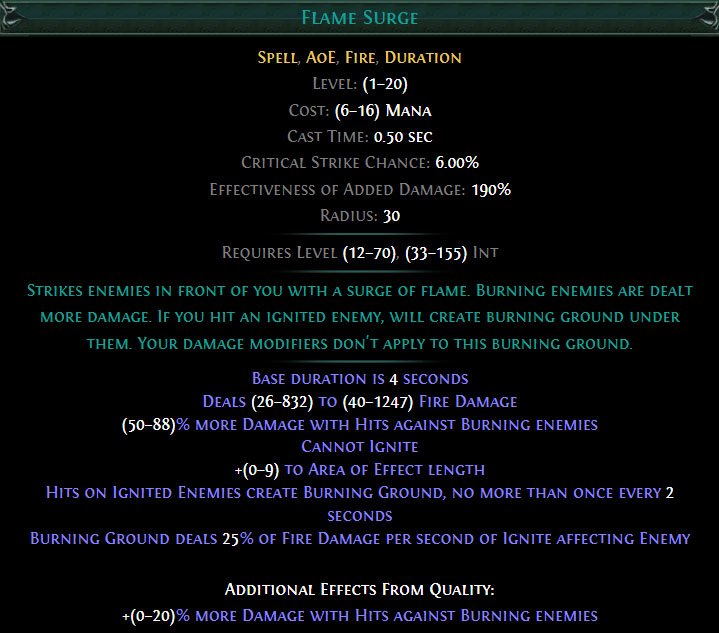 when you pick up your quest reward from act I town.
Cost: 1 Transmutation
I recommend two choices for the bandits quest. Either kill them all and get the extra skill point or help Kraityn for the extra movement speed. Helping Alira is a crutch that is not necessary and quickly becomes obsolete. Your resistances should be good just from bench crafting them on your gear. For the fastest leveling time I recommend helping Kraityn.
Take
Flammability
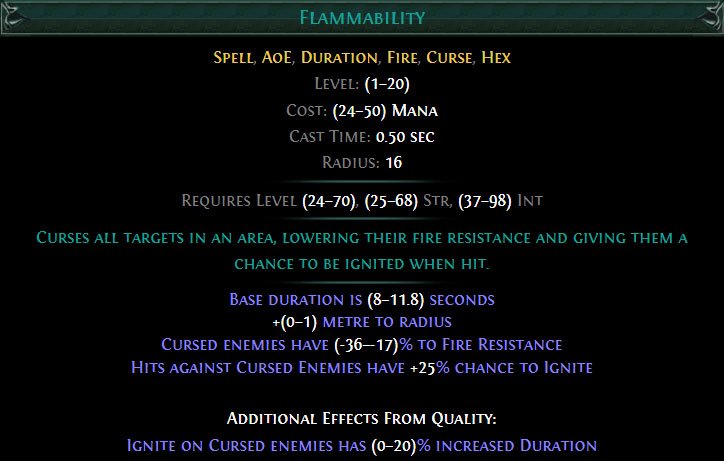 as your quest reward after defeating Piety in Crematorium and buy
Anger
as your quest reward after defeating Piety in Crematorium and buy
Anger
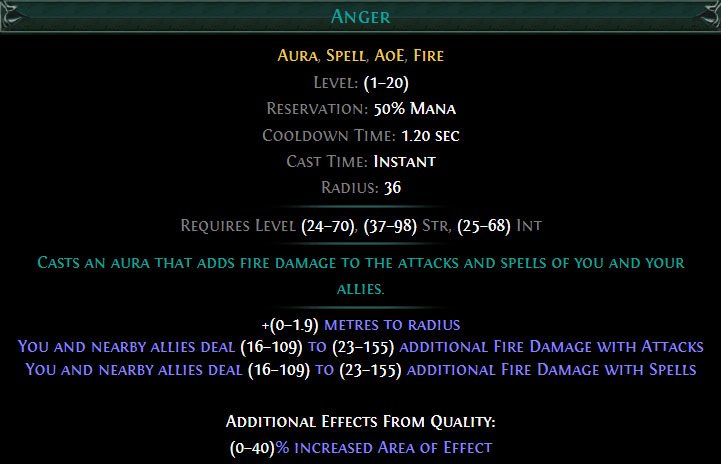 .
.
Cost: 1 Alteration
You should check the vendor for 4-links any time you're in town from now on. Your ideal 4-link colours are: BBBR and BBBB.
In Solaris Temple level 2, make sure to pick up the Fire Damage recipe from the side area next to Lady Dialla and a Jade Amulet from her.
Wearing a Jade Amulet and a Heavy Belt is necessary to meet all of your attribute requirements.
As soon as you get to the Ebony Barracks you should pick up the waypoint and head up and to the right, to the Imperial Gardens. Grab the waypoint there as well and do the Library. Try to improve your Cold Resistance before entering this zone or you will risk getting Frozen to death (or at the very least significantly slowed down).
From Library you should pick up
Fire Penetration
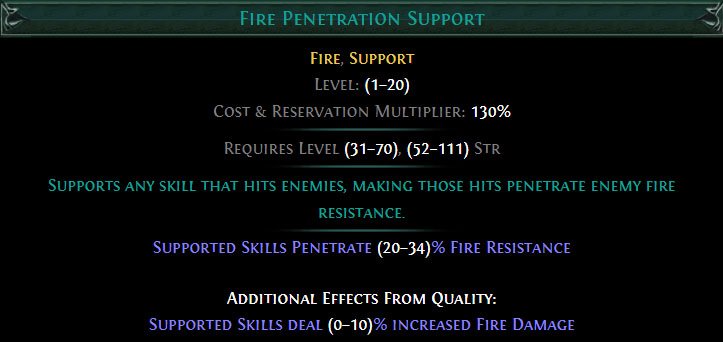 as your reward and buy:
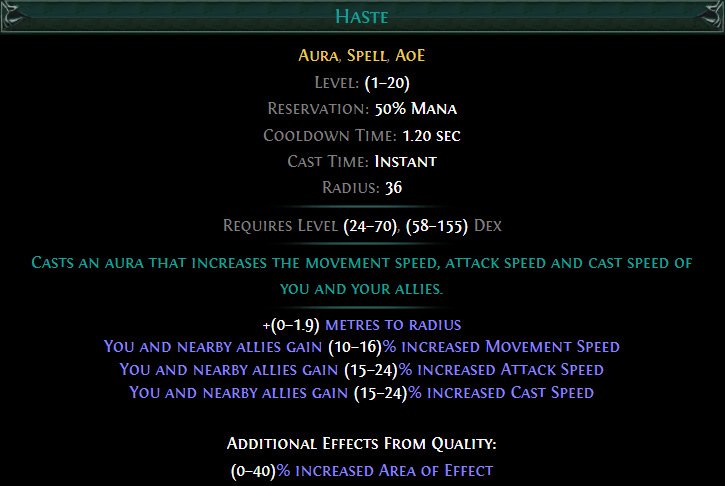
Haste
 ,
Faster Attacks
,
Faster Attacks

Cost: 1 Transmutation, 1 Alteration
You can also buy
Blood Rage
 if you have enough Alterations for the next purchase.
Cost: 1 Alteration
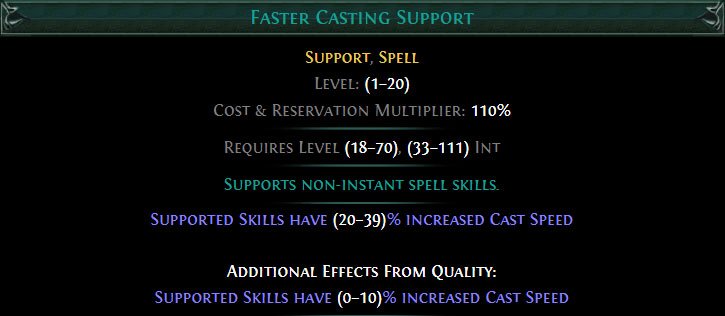
Go to Act II town and buy
Elemental Focus
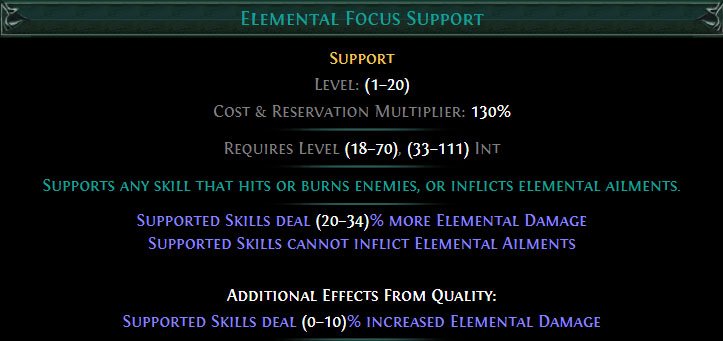 +
Faster Casting
+
Faster Casting
 . You can also pick up your Weaver quest reward from Silk.
Cost: 2 Alterations
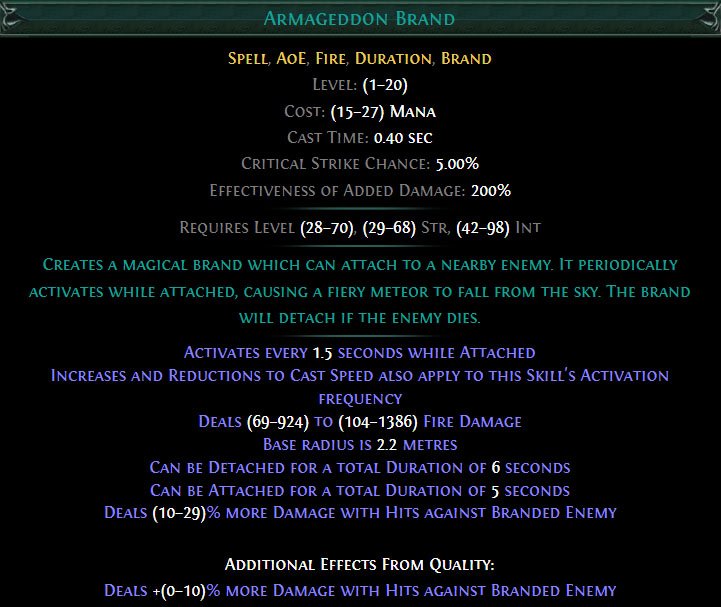
Kill Gravicious and take
Armageddon Brand
 as your quest reward.
At level 28 you want to spec into the Runebinder Keystone and swap to the
Armageddon Brand
+
Flame Surge
setup which should ideally look like this:
Armageddon Brand
+
Elemental Proliferation
+
Combustion
+
Cruelty
Flame Surge
+
Arcane Surge
+
Faster Casting
+
Elemental Focus
Wave of Conviction
Flammability
Haste
Shield Charge
+
Momentum
+
Faster Attacks
Flame Dash
and if you have the sockets for it, keep your
Anger
socketed and swap to it for boss fights such as Piety, Dominus and Izaro. Just remember to swap back to
Haste
after the fight or just use
Haste
at all times.
You should also craft Fire Damage to Spells on your weapon as soon as you can. Ideally you'd do it on a weapon with the most base damage, since it will apply to your spells through the Instruments of Virtue after you do your first lab.
Cost: 4 Transmutations
I recommend doing the Labyrinth around level 33 at the beginning of act IV. Once you ascend as Inquisitor, pick Instruments of Virtue as your first passive. This allows you to take advantage of the attack damage of your weapon which will now apply to your spells as well.
After Killing Malachai, buy
Hextouch
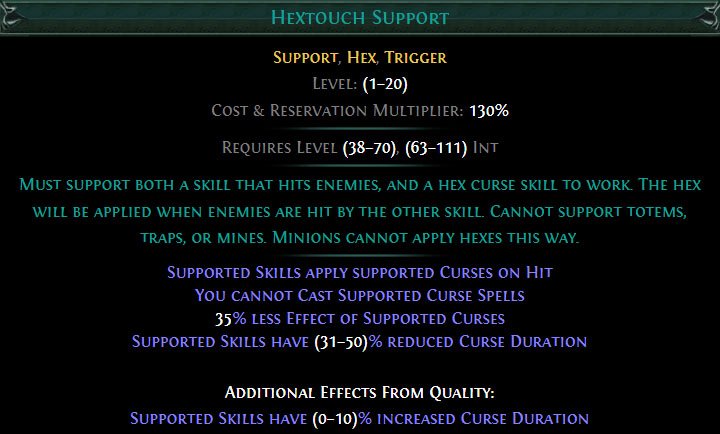 from Petarus and Vanja and link it with
Wave of Conviction
and
Flammability
. You'll need a BBB 3-link.
from Petarus and Vanja and link it with
Wave of Conviction
and
Flammability
. You'll need a BBB 3-link.
Cost: 1 Alchemy
Later on, after you pick up Life Regeneration passives or get the Pious Path Inquisitor passive you can look to fit
Blood Rage
+
Automation
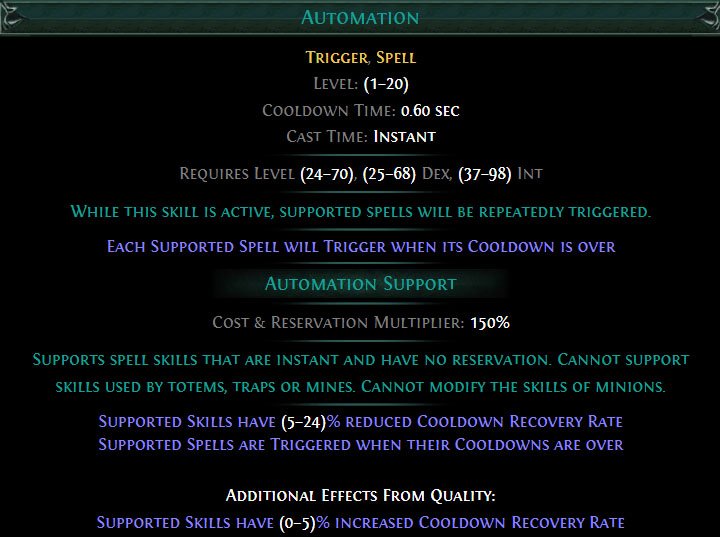 in your gear and turn it on for the rest of the campaign. You can buy them both in the Library or Act 3 town.
Cost: 2 Alterations
From this point your setup remains the same until the end of the campaign. From your second Lab you should select the Pious Path passive, followed up by Instruments of Virtue from the third Lab.
Continue working on your gear and resistances and progress to maps.
The PoB includes passive skill tree progression, gem setups and a set of gear.
Besides the leveling setups, you will find a low budget endgame setup for
Penance Brand of Dissipation
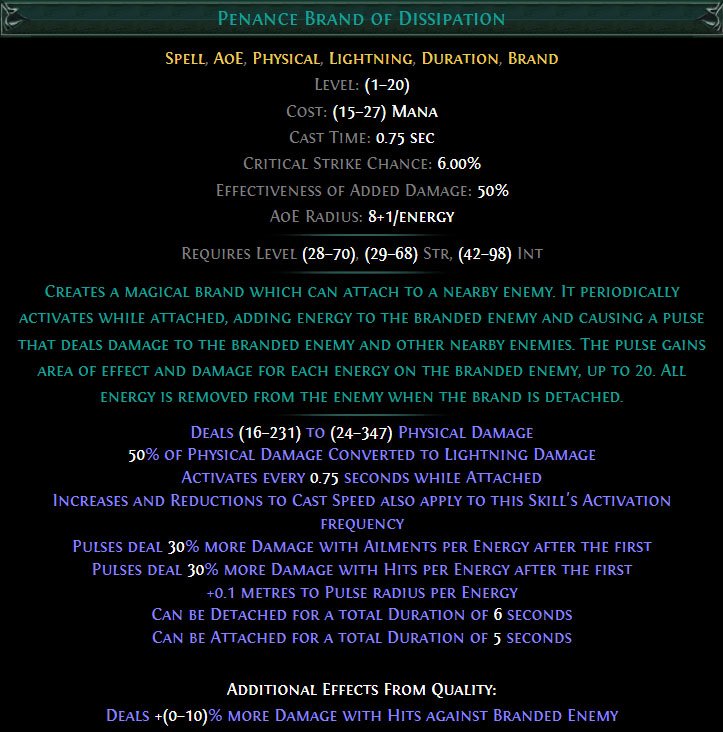 Inquisitor. This build is optimized for running early Sanctum and is not meant for general mapping. For mapping I would highly suggest another brand skill or using
Inpulsa's Broken Heart
Inquisitor. This build is optimized for running early Sanctum and is not meant for general mapping. For mapping I would highly suggest another brand skill or using
Inpulsa's Broken Heart
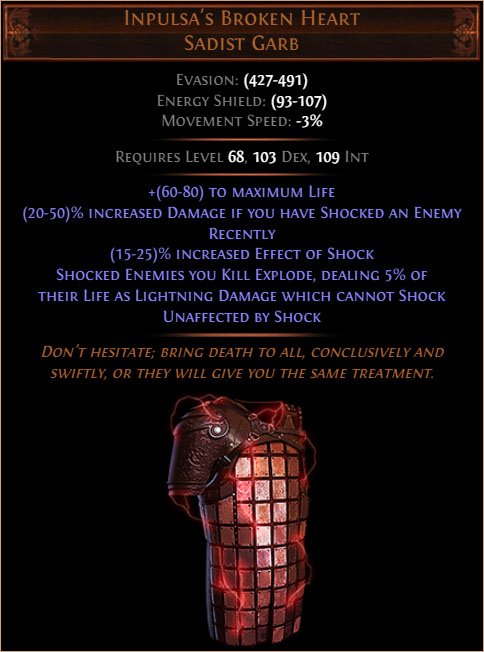 and scaling some AoE, as well as including more defensive auras.
Check out the PoB and the Video guide for more information about passive tree progression.
Good luck!
- Asmodeus